Official owner setup

FrightLink setup.
Start here.

Charge, pair, connect, and test your Hub, Ghost motion sensors, and Executioner prop triggers. Follow the steps below to build your first working scene.

Runs locally Wireless sensors Timed scenes
FRIGHTLINK NETWORK
SYSTEM READY3 SENSORS → MULTIPLE SCENES → 3 PROPS

Before you do anything else

Charge every battery-powered piece first.

Fully charge every Ghost and Executioner with a regular 5V USB‑C charger before pairing. Do not use a fast charger, and never charge a cold battery below 40°F (4°C). The Hub plugs into the wall—it does not need to charge.

DO THISFIRST

Meet your crew

Every piece has one job.

The Motion Sensor (“Ghost”) notices. The Control Hub decides. The Wireless Prop Trigger (“Executioner”) carries the cue to a distant prop. Your bundle may include different quantities, but the roles never change.
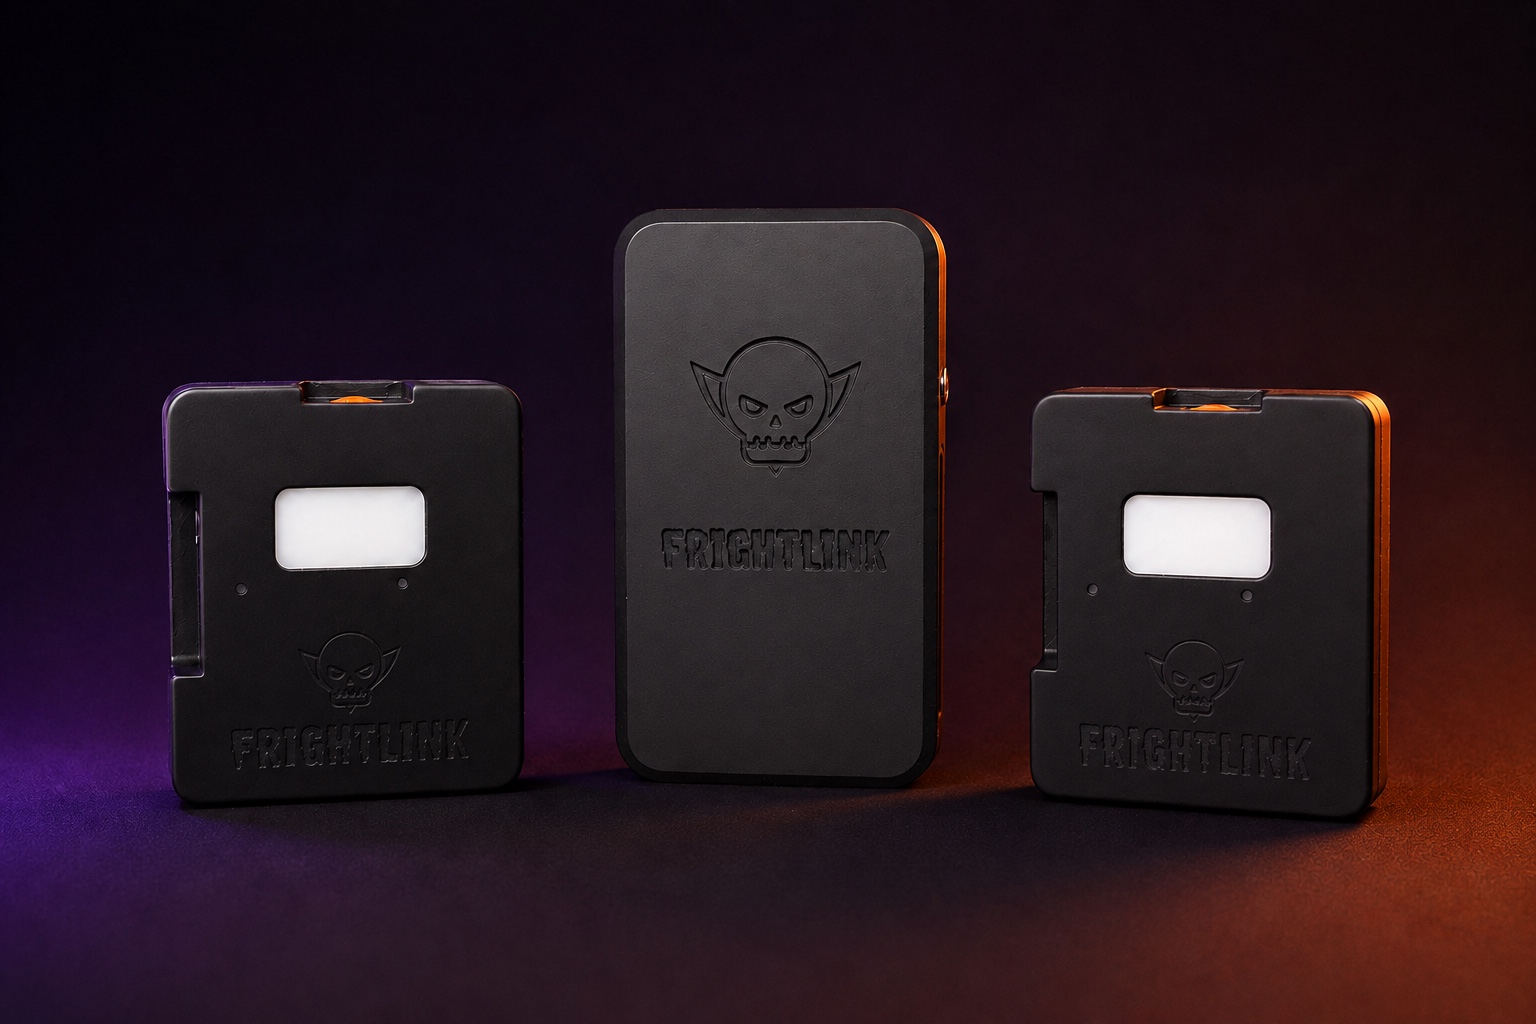
FrightLink Control Hub between a Motion Sensor and Wireless Prop Trigger
The two small units intentionally look alike. In the app, one is assigned as a Motion Sensor (“Ghost”) and the other as a Wireless Prop Trigger (“Executioner”). Set them down one at a time while pairing so you always know which physical unit you are configuring.
THE BRAIN01

Hub

Runs the show. It receives guest events, executes your saved timing, and fires local wired ports or wireless Executioners. Plug it into its included wall adapter.

  • Set it up first
  • One Hub controls up to 16 local devices
  • Your core scenes keep running locally
THE EYES02

Motion Sensor “Ghost”

Watches the guest path. When it detects movement, it reports the event wirelessly to the Hub so the assigned scene can begin.

  • Rechargeable over USB‑C
  • The sealed 3.5 mm opening is not used—do not remove its rubber cap
  • Test placement with a real walk-by
THE MUSCLE03

Wireless Prop Trigger “Executioner”

Plugs directly into the prop's 3.5 mm Try Me port. It receives the cue wirelessly from the Hub, then triggers the prop through that physical connection.

  • Rechargeable over USB‑C
  • One per remotely triggered prop
  • It triggers the prop—it does not power it
FrightLinkHUB
AUX
PROP 2
PROP 1
POWER
HUB ONLINE

Power connector on the right → the three trigger jacks read AUX · PROP 2 · PROP 1 from left to right.

Know the Hub

Know exactly which jack is which.

Hold the Hub with its power connector on your right. The three 3.5 mm jacks run left to right: AUX → PROP 2 → PROP 1. AUX is the jack farthest from power.

AUX

The only input / output port

AUX can be configured as a local Try Me or step-pad input, or as a third wired prop output. PROP 1 and PROP 2 cannot be inputs.

P2

Prop 2 — output only

Connect a 3.5 mm trigger cable from this jack to a compatible prop's Try Me or step-pad input.

P1

Prop 1 — output only

A second independent wired prop output. Give each port a clear name inside FrightMaps so scene building stays simple.

PWR

Power

The far-right connector is for the included Hub power adapter. Use only the supplied adapter.

Buttons & lights

Pair, restart, or clear pairing?

They are different actions. Start with a normal restart or pairing mode; do not clear a device just because it looks offline.

To pair either Ghost or Executioner

  1. Charge the device, place it beside the powered Hub, and open the Hub's device discovery in FrightMaps. Depending on your app version, this is FrightLink Devices or Manage Sensors → Scan for Sensors.
  2. With the device awake, hold BOOT/action for 3 seconds, then release. Release before 10 seconds to avoid clearing the existing pairing.
  3. Look for blinking blue. This is the pairing window, which lasts about 30 seconds. Keep discovery open and select the correct device.
  4. Pairing acknowledgment flashes green three times. Confirm the device appears in the app, then test it. Green flashes alone are not proof of a working scene; other operations also flash green.

If the window expires, repeat the 3-second hold. Entering pairing mode does not first erase the saved pairing. Accepting a new Hub replaces the association.

Motion sensor

Ghost

Enter pairing
Hold BOOT/action for 3 seconds, then release.
Clear its Hub pairing
3 quick taps of BOOT/action, with less than 2 seconds between taps.
Alternative pairing clear
Hold BOOT/action for 10 seconds, then release.
After clearing
Confirmation flashes finish with blinking blue: ready to pair again.

Wireless prop trigger

Executioner

Enter pairing
Hold BOOT/action for 3 seconds, then release.
Clear its Hub pairing
5 quick taps of BOOT/action, with less than 3 seconds between taps.
Alternative pairing clear
Hold BOOT/action for 10 seconds, then release.
After clearing
Confirmation flashes finish with blinking blue: ready to pair again.

A quick tap means press and release in under half a second. These two products currently have different tap counts. Do not use this table for the Hub or a different sensor model.

What the light tells you

Blinking blue
The accessory is in pairing mode, not yet proof of a Hub connection.
Green flashes after pairing
A pairing response was received. Verify the matching device in the app.
Red during a long hold / clear
Executioner warns near the 10-second clear threshold; a 10-second clear on either product starts with red flashes. Red is not a universal “offline” code.
Brief assigned-color flash
Can indicate motion or output activity when that LED is enabled. A Ghost flash does not prove the prop received a trigger.
No light
Normal during idle or sleep. It does not by itself mean a flat battery, disconnection, or power-off.

Does this erase all data?

No. There is no “erase everything” tap count. The accessory gestures clear its saved Hub association, not its name, LED preferences, or sleep schedule. They do not delete the Hub's device list, scenes, or cloud records.

To remove a device from your setup, use the app's remove-device action while connected to the Hub, then check the list after reconnecting. Also review scenes that referenced it. Clear the accessory's pairing separately if retiring it or moving it to another Hub. Do not assume a button press has deleted account data.

What about the Hub?

A normal RST press restarts the Hub; it is not an app-controlled factory reset. Hub discovery and adding accessories happen in FrightMaps, not through the Ghost or Executioner tap sequences.

For an intentional Hub wipe, use Factory Reset in the Hub's configuration and read its confirmation carefully. This erases Hub settings; it is not an account-wide delete. Do not use it as the first response to a disconnected phone.

Can taps turn it completely off?

No tap-to-power-off feature is currently available. Use Power Schedule for battery-saving sleep outside show hours. Sleeping devices are not available for normal motion detection or prop triggering until awake again.

Sleep is not a physical power cut: some battery draw remains. A dark LED is not an off indicator. A future storage mode would need a dependable wake method before it could be offered safely.

Button reference checked September 5, 2026 against production Ghost 1.0.8 and Executioner 1.0.0.7 source. Check the firmware version in the app; other models or firmware may differ. This guide does not install an update.

Owner field guide

Protect the batteries. Extend the season.

These are the details that matter after pairing—the rules that prevent damaged batteries, dead sensors, and accidental damage to a Ghost enclosure.

01

Battery safety

Warm first. Charge slowly.

Never charge a Ghost or Executioner while it is colder than 40°F (4°C). Bring the complete unit indoors and wait until it has warmed above 40°F before connecting USB‑C.

  • Use a regular 5V USB‑C charger
  • Do not use a fast charger
  • Charge fully before first pairing
02

Power schedule

Let every sensor sleep outside show hours.

In FrightMaps, open the Hub, select a Ghost or Executioner, then open Power Schedule. Turn on Enable schedule, choose when it should sleep and wake, then save.

  1. Wake it 30–60 minutes before guests arrive.
  2. Put it to sleep shortly after the show ends.
  3. Use Wake now (15 min) for daytime testing; waking can take up to about 90 seconds.

A five-hour nightly awake window lasts about 4–5 nights on a full charge; shorter show windows last proportionally longer.

03

Ghost enclosure

That rubber cap stays put.

Ghost uses the same enclosure style as other FrightLink devices, but its 3.5 mm opening is intentionally sealed. Do not pry, pull, cut, or remove the rubber cap. Ghost does not use that port.

Use only the accessible USB‑C charging connection.
04

Hub cheat sheet

AUX · PROP 2 · PROP 1

With the power connector on the right, that is the left-to-right order of the three 3.5 mm jacks. AUX is farthest from power and is the only jack that can operate as either an input or output.

AUXIN / OUTP2OUTP1OUTPWRRIGHT

Start-to-scare

Set up in this order.

Do not mount anything permanently until the entire chain works on a table. Pair close. Test close. Then move each piece into the haunt.

DEFAULT HUB PIN1234You can change it after pairing.
  1. 01

    Charge, update, and gather

    Once every device is above 40°F (4°C), charge each Ghost and Executioner with a regular 5V USB‑C charger—never a fast charger. Update FrightMaps to 5.1 or newer and turn on Bluetooth. Have your Wi‑Fi credentials ready only if you want OTA firmware updates or cloud triggering.

  2. 02

    Power the Hub

    Connect the included adapter and let the Hub start with your phone nearby.

  3. 03

    Pair the Hub in FrightMaps

    Open FrightMaps → FrightLink. Under Discover New Devices, choose your Hub and enter PIN 1234 when prompted.

  4. 04

    Optional: connect Wi‑Fi and name it

    Skip this step if you only need local operation. To enable OTA firmware updates and cloud triggering, open WiFi Configuration, enter the network name and password, tap Connect to WiFi, and give the Hub a useful location name.

  5. 05

    Pair Ghosts and Executioners

    Open your Hub, choose Find Sensors or Manage Sensors → Scan for Sensors, then pair and name each device one at a time.

  6. 06

    Connect props and build the scene

    With props powered off, plug each Executioner directly into its prop's Try Me port. Connect nearby wired props to the Hub, then assign the outputs and timing you want to the Ghost that starts the scene.

  7. 07

    Schedule battery-saving sleep

    Open each Ghost and Executioner, enable its Power Schedule, and keep it asleep outside show hours. Wake it 30–60 minutes before opening and save the schedule.

  8. 08

    Test the whole event

    Power the props back on. Test individual outputs first, then walk through the Ghost detection area and confirm the complete guest → scene → scare chain.

Quick rescue

If something does not appear…

Start with power, distance, and the simple stuff. Most first-pairing issues disappear when everything is charged and sitting together.

Email FrightLink support
The Hub is not appearing in the app +

Confirm the Hub has power, Bluetooth is enabled, and FrightMaps is updated to 5.1 or newer. Keep the phone close, return to the FrightLink device list, and refresh the scan.

A Ghost or Executioner is missing +

Charge it fully and place it beside the powered Hub. With the accessory awake, hold BOOT/action for 3 seconds, then release before 10 seconds. Look for blinking blue, keep the Hub’s device discovery open, and pair one accessory at a time. Use the buttons and LED guide to identify the correct button; do not hold RST for 15 seconds.

The prop does not fire +

Make sure the prop itself is set to Step Pad / Try Me mode and the cable is connected to its Try Me or step-pad input—not an audio jack. If it is connected to AUX, move it to PROP 1 or PROP 2, select that output in FrightMaps, and test again. Confirm the prop is powered and that the right port or Executioner is selected in the scene.

A scheduled sensor looks offline +

A sleep schedule can explain why a device is unavailable, but “offline” alone does not prove it is asleep. Check its schedule and last check-in, then use Wake now (15 min) and allow roughly 90 seconds. If it still does not respond, check power and distance and send diagnostics; do not clear pairing as the first step.

Should I remove the rubber cap on Ghost? +

No. Ghost shares its enclosure style with other FrightLink hardware, but the unused 3.5 mm opening is intentionally sealed. Do not pry, cut, or remove the cap.

Can the haunt run without internet? +

Yes. The core Ghost → Hub → output scene runs locally, so Wi‑Fi is optional. Connect the Hub to Wi‑Fi when you want OTA firmware updates or cloud triggering.

Welcome to FrightLink

Build it. Test it. Make them scream.

Thank you for being one of the first haunters to put FrightLink in the field. We cannot wait to see what you bring to life.